I wasn't sure if it would work, but I think I have succeeded in making not only a simple build of the cannon but also a fold flat version!
Behold, a squashed cannon! :-)
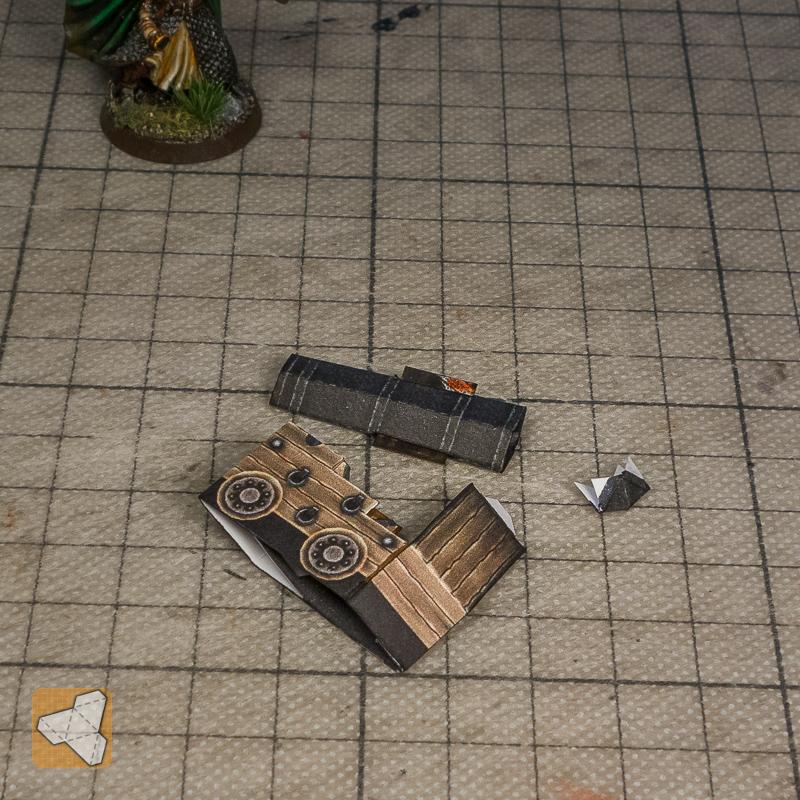
There are three parts, the gun carriage (lafette) and the barrel plus ending part. The carriage usually has a wedge in the ...
2018-05-20 06:29:40 +0000 UTC
View Post
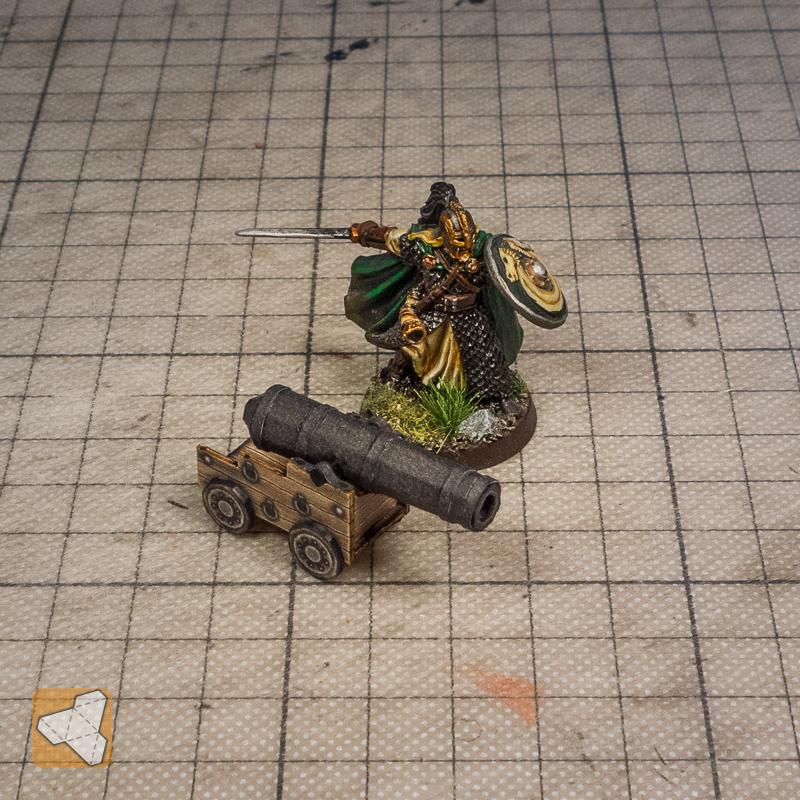
Once I got the geometry finalized I went on to texture this little model. I start by sketching a rough form directly onto the white model.
Then comes the actual (digital) painting where I create all the textures I need. The result in this case is a very nice paper canon! Here is the front view ...
 <...
<...
2018-05-18 06:17:33 +0000 UTC
View Post
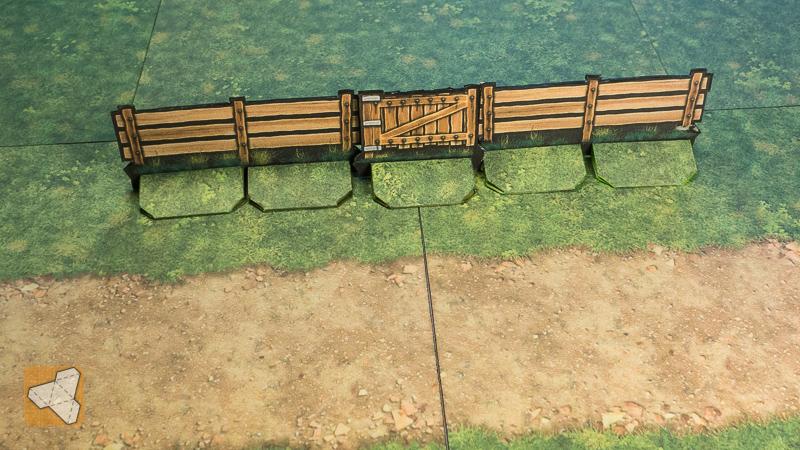
During the last days I have competed building the elements for the fences. The broken ones always take the longest to design, but now it is done.
The last ones where the missing 3" lengths and ...
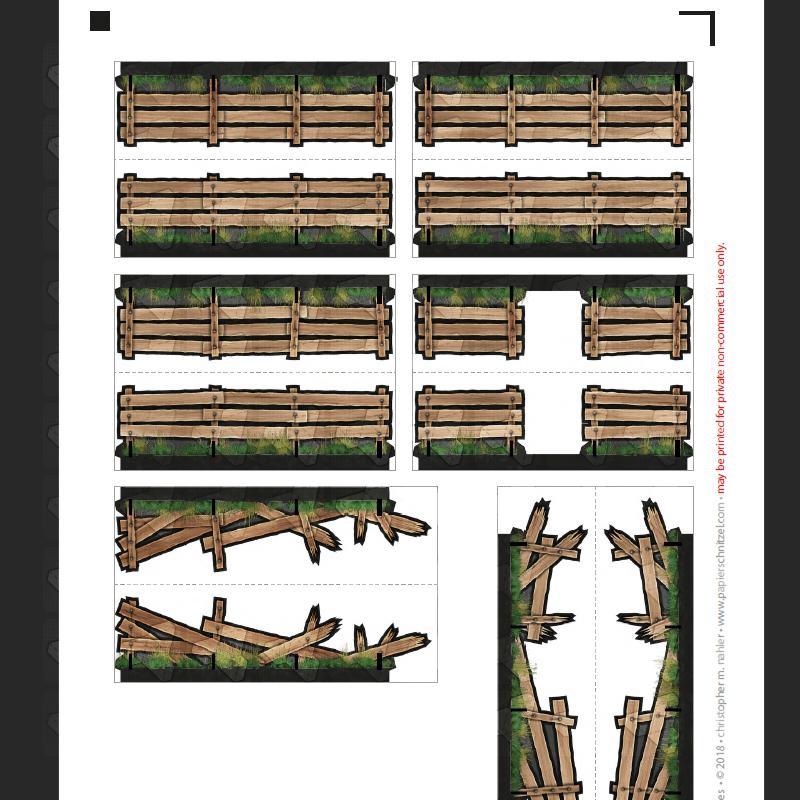
... and a bonus large gate which sort of materialized without me really planning ...
2018-05-16 12:16:02 +0000 UTC
View Post
For the pirate ships I have planned later, I need cannons!
So some time ago, I started with the above prototype. I just wanted to get the size right. I quickly made a "Jack Sparrow" test figure from an image I found on the net.
Tonight I had some time after working on the 3" fences, so I thought I try to refine the cannon.
I made the gun barrel a simpler (8 sided) shape and also used...
2018-05-14 18:45:59 +0000 UTC
View Post
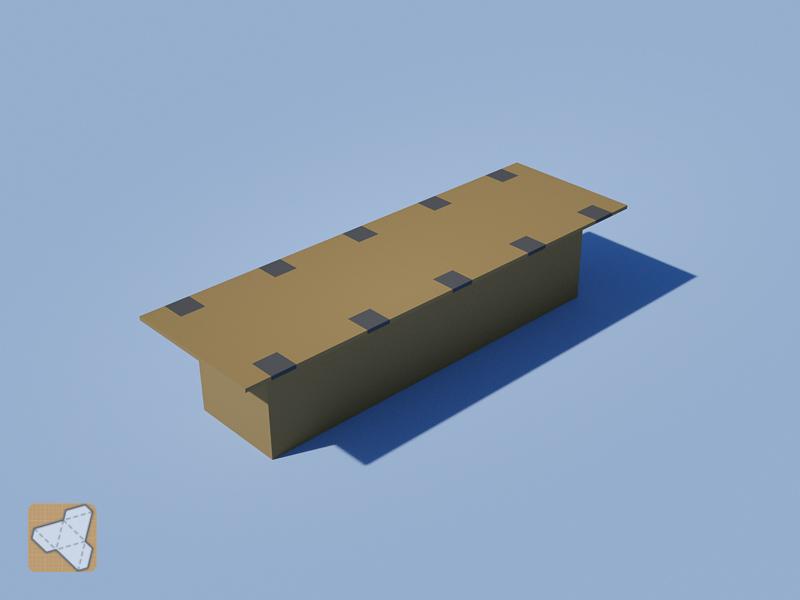
This is first texture sketch for the docks. The main surface is just the wood but I have optional layers so you can add either (or both) the poles top or the metal rings to tie your boats.
For the easy build, which is basically a box, the poles would be painted on the sides. For the advanced build, you would cut out the spaces where the poles are textured and actually build some poles (as shown ...
2018-05-12 11:00:01 +0000 UTC
View Post
Quick update today on the fences. I have created the 6" versions of the fences. Like the ones before they come in regular, irregular and broken version.
Here is a look at the broken one, which I am especially proud of. The broken ones take the longest to design :-)
Happy building,
Chris...
2018-05-09 07:30:25 +0000 UTC
View Post
While Gandalf is practicing his "You shall not pass!" I will show you the fences I built :-)
The above show the front of the regular fence elements with the bases for positioning. All fences also have a back side.
If you don't like the bases version you can place the element with the standees...
2018-05-07 08:01:00 +0000 UTC
View Post
This is a 3D sketch for a docks/pier module. It's the advanced version with poles on the sides. The grey areas would be textured as metal and feature the rings where you could tie your boat to.
A simpler version would look like this.
Here you skip the poles and instead have the constructi...
2018-05-07 06:46:32 +0000 UTC
View Post
I have completed the first set of fences. The are 2" in length and come as regular, irregular and broken versions. They all have a front and back view and can be positioned with either the bases or the standees like the bamboo fences.
About the docks, I have to do more research and tests to see how I want to do them. I have a whole line of boats planned thought the docks could be a nice starter ...
2018-05-06 16:29:02 +0000 UTC
View Post
I have two questions for you guys!
The first is: What to do in May? I am interested in finishing the third Village Builder set but also very eager to tackle the Wako Pirate Boat. What are your preferences?
And the second question is regarding the goals. As my first goal have only put a place holder (the treasure chest). I couldn't think of anything better back the...
2018-05-04 04:30:37 +0000 UTC
View Post
OldSchoolDM found some bugs in the instructions and pointed out some ideas to improve the cart ... so I fixed the bugs and improved the cart! :-) I have added reinforcements for the weak corner glue tabs and an optional underside if required. Great for turned over carts to be used as cover!
I have updated the files in the dropbox (instructions, cart pdf and cart cutfile) ready for you to downloa...
2018-05-03 09:46:59 +0000 UTC
View Post
Each month, when I release a new set of creations, this is going to happen.
1. A couple of days before the end of the month I will create a "paid post" announcing the contents of the new rewards of the month.
2. At the end of the month Patreon will charge you with your pledge. Once this process is completed I will receive the information who actually was charged and who not (due to limits ...
2018-04-27 08:37:59 +0000 UTC
View Post
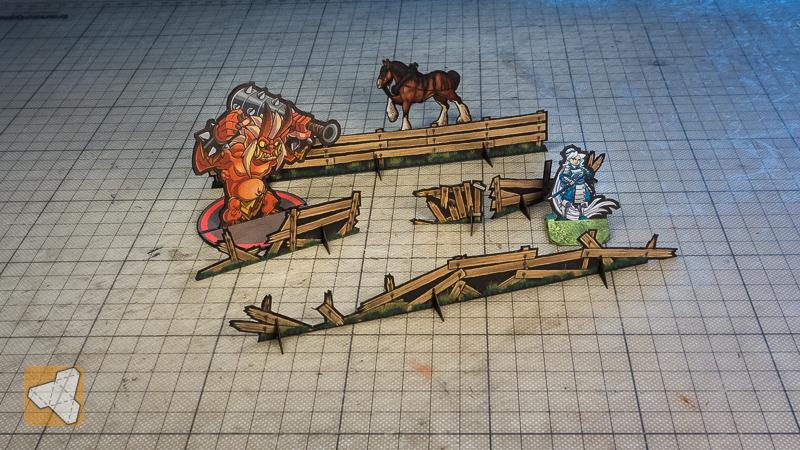
In addition to the ground tiles I managed to squeeze in some bonus extras this month. Small items, but I think they make the village look more lived in!
Here is an "aerial" view of the scene ...
You can also see the alternate method of placing the fences if you don't want t...
2018-04-26 06:04:25 +0000 UTC
View Post
I reworked the roof of the hut as there was something off in the previous geometry. The roof was too short! So today I can show you the final hut with weathering and a ladder.
I then updated my free base files with the new ground textures. I also built one bamboo fence to see how it looks with the base method. There will be another way to place the fences which I'll show you soon.
In the m...
2018-04-24 12:44:39 +0000 UTC
View Post
As I am in the process of creating fences, I thought I ask you guys if there are any special needs for gaming I should consider?
I am planning on making the fences either around 15mm or 30mm high. The half height would be for the typical garden fence and the full height for cattle fences.
These sketches are 3" long. To make other lengths one could manually cut them to the desired size. Are...
2018-04-23 17:23:20 +0000 UTC
View Post
Last weekend I created a whole set of ground tiles and this week I was planning to make some large battle maps with them. Unfortunately I found that when I was tiling the together digitally, the borders had some artifacts that I did not see before.
So this week I had to go back and rework all the ground tiles so they would better support the tiling. I hope to be able to make sound larger terrain...
2018-04-20 15:21:21 +0000 UTC
View Post
I was a grass widower this weekend, so I had enough time to create all the ground tiles with roads and "openings" (like open spaces of dirt within the grass) I could think of.
I ended up with almost 100 roads, bends, crossings and openings!
Here is a little schematic view of how I designed them.
 2018-04-16 11:45:06 +0000 UTC
View Post
2018-04-16 11:45:06 +0000 UTC
View Post
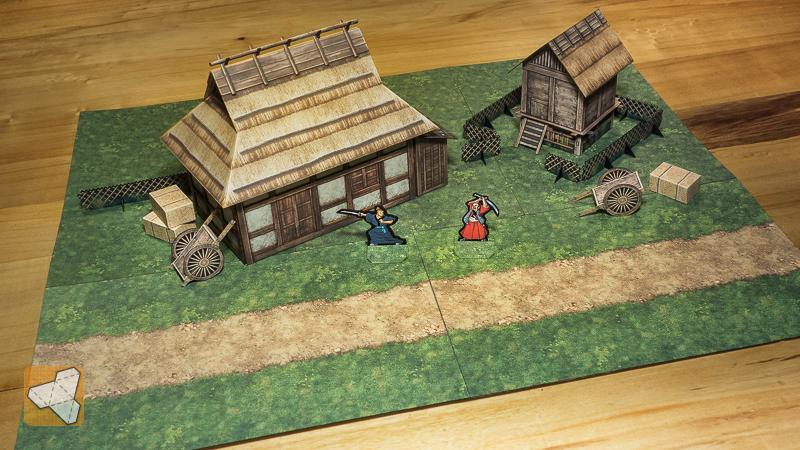
I have pretty much settled on the workflow for creating the transitions and made a little test print. I quickly grabbed the next buildings and minis in reach and set up this diorama. I think the ground tiles will look really great.
I am also going over the light and dark ground tiles to make a new version for the 9x6" format and compress the file size.
So next I will create all the roads, ...
2018-04-13 18:02:05 +0000 UTC
View Post
Now that I have the grass and the ground dirt textures I need to transition them for roads and market places etc.
I have started with a very quick and rough version (on the left) but it looks too linear. So I started creating a mask of actual grass clumps and using them on the right side. This looks much better although I need to fine tune the size. It feels a little small and the detail is almo...
2018-04-12 08:09:53 +0000 UTC
View Post
I have started working on the next phase. As I want to focus on the terrain so to speak I thought I might be able to come up with some smaller projects that will fill the world and make it look more "used" and "lived in".
So the theme is going in the direction of "the farm" and I have created these raised store houses and some carts. I will also make some bundles of straw/hay and some fences.&nb...
2018-04-10 09:48:07 +0000 UTC
View Post
So for the next month I really want to complete my last months goal which somehow got overrun by the Shrine :-)
If you remember I wanted to focus on the mixed ground tiles. By that I mean grass tiles with either roads or areas where the dirt is showing (maybe for placing buildings).
I want to build a nice large ground area so the Samurai Village when the third house will be done has a nice...
2018-04-07 13:34:34 +0000 UTC
View Post
Is it the easter bunny or a shinto kami? Strange things happen when easter and april fools day coolide :-)
I am off to meet with the folks and will be back on Tuesday with the going live of the new release.
Happy building,
Chris
2018-04-01 05:38:06 +0000 UTC
View Post
I have finished the clean up for the shrine walls, adding all that was missing and correcting all the little bugs I could find while building the fold-flat version.
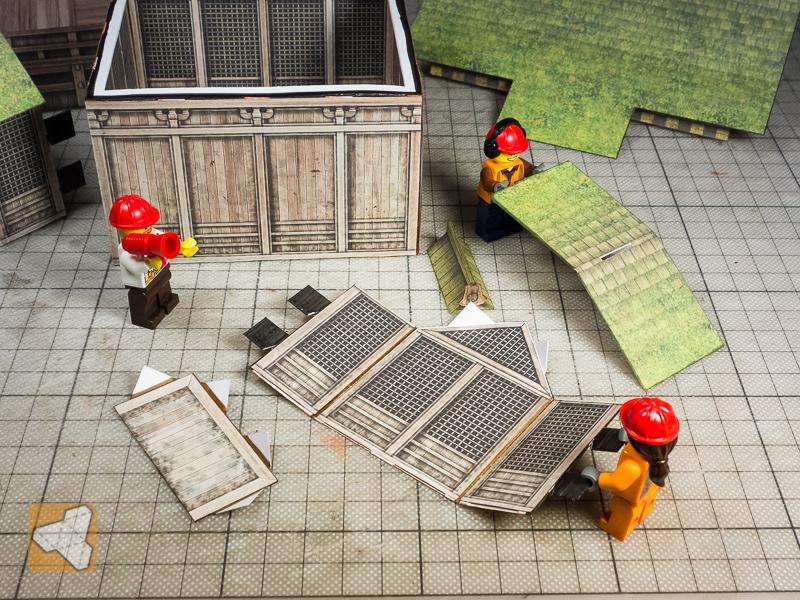
Here my loyal working crew is showing the disassembled fold-flat extension. I have added a moss layer for the walls also, but didn't u...
2018-03-29 07:18:11 +0000 UTC
View Post
While doing the instruction pics I realized that I needed a way to make the extended walls for the shrine and platform attach and detach for the fold flat version.
So I started with some test to slot in the expanded elements.
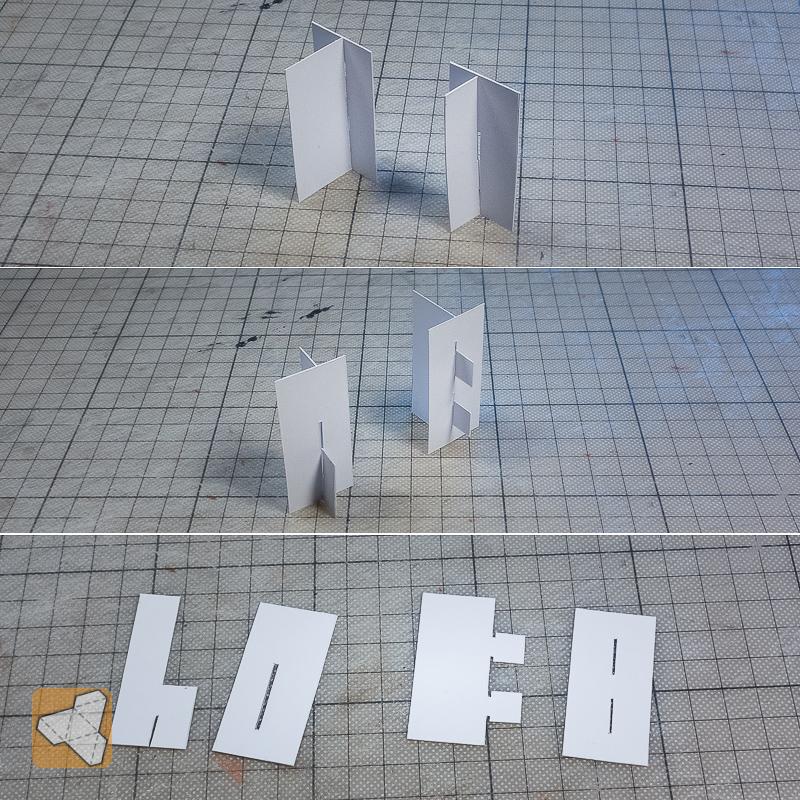
I saw that two slots are better as they hold and align the attachi...
2018-03-27 11:08:37 +0000 UTC
View Post
I have been working on the weathering and started the instructions pics build run. This is the mossy, fold-flat roof. In the back you see the unweathered roof for comparison.
Next will be the build of the weathered house walls and the platform ...
2018-03-26 16:18:53 +0000 UTC
View Post
I have basically completed all the parts now. I have to speed up now to get the weathering and moss texture for the roof done in time. Only about a week left for this month! The ground tiles I have planned might be a little late this time...
No time to talk! Later!! Bye bye!!! :-)
2018-03-23 06:43:32 +0000 UTC
View Post
I was asked whether the platform could handle heavy metal minis.
Well, here is the answer! I dug out my old Lord-of-the-Rings mini collections and crammed all the metal minis that would fit on to the platform.
No problem holding 531grams of metal for my platform :-)
This is the part I m...
2018-03-22 06:23:51 +0000 UTC
View Post
Just wanted to let you guys know that I got mentioned on the Beasts of War website. Go check it out if you have time, leave a comment and help spread the word :-)
Happy building,
Chris
2018-03-22 06:06:15 +0000 UTC
View Post
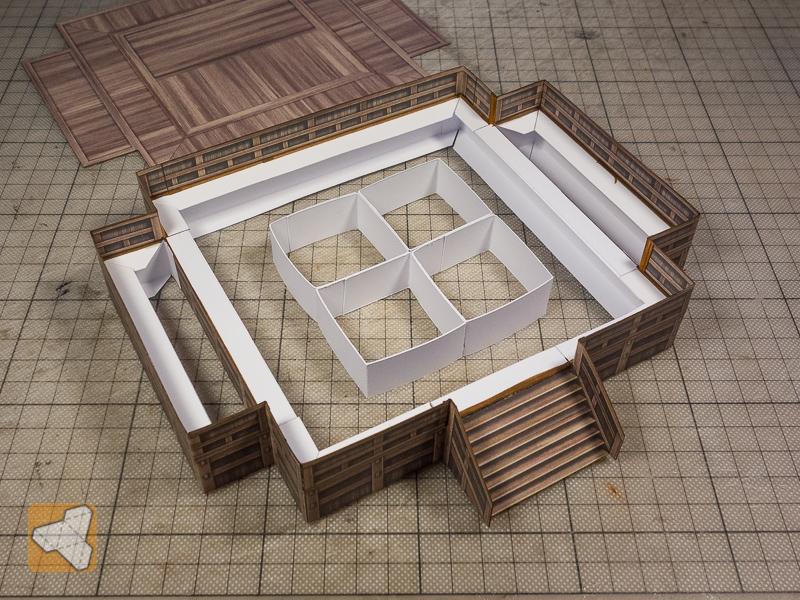
I completed the extension parts of the base and built one version. There is a narrow (2") and wide (4") extension and I have built the wide one. When I built it I realized you could even mod the wide extension to have an entrance with stairs! That will make for a lot of possible combinations to build!!! Now all that is left is the extension of the building and then I can start working on getting t...
2018-03-21 06:38:30 +0000 UTC
View Post
I completed a first full build. I made the roof a standard fixed glued version to include the outside rim parts. I think the fold flat version without them (see the previous posts) will be much easier to build and maybe even look better as you have unhindered view of the under construction.
Now it's time to start building the extended versions and then tackle weathering ...
2018-03-19 09:53:26 +0000 UTC
View Post