This series was originally shot in December 2016 back before I was releasing downloads. When I did start releasing downloads to sell I went back through all my shoots to see if there was an opportunity to get a full download out of them. This one had great potential. It became the download called "1 x 2".
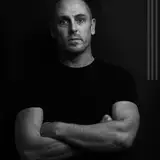
This post is a run down on how I got from the original image of Chris (left) to the final effect on the right. As you can see, the original image was ok but nothing spectacular. Chris was standing with a large diffusing "scrim" behind him. Behind that light was a studio light set to fairly bright from memory with a very large umbrella on it to make the light source as large as possible. The light is actually facing away from Chris but bounces into the metallic inner side of the umbrella and reflects back, effectively making the light as large as the umbrella.
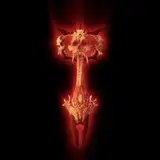
For this series I found a set of free "light leak" images online which mimic the effect of light leaking into an old film camera and exposing / ruining film.
I put that dark purple light leak over the top of Chris, completely covering him. Then in the Photoshop Layer Styles I used the "blend if" function to control where the purple disappeared which got rid of that very dark purple (see the third frame in the wide step-by-step) image. In the fourth frame you can see when I turn the Chris layer back on we now have a semi transparent overlay. I then adjusted the colours very slightly using Hue and Saturation.
In the final frame, the end result, this is achieved by then selecting the light leak layer and changing the layer blend mode to "difference" which really flips the colours and where the overlay is dark, it then almost inverts the colours of Chris behind it.
It's not an effect I would use a lot and I'm not sure I'd consider it "my style" but I believe all creatives should keep experimenting and seeing what other techniques might help push their work. Learning is growing.