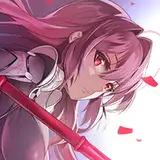
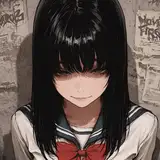
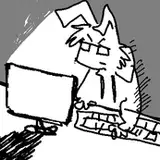
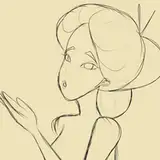
The first step is a sketch! This is to sort of y'know, get the general idea and feel of the picture. I try to keep in mind the composition and lighting of the piece in the sketch step.

Next step is lining~ As you can see, my lineart is not the cleanest LOL but that's okay with me. I aim to have a more lose and fun(to work on) piece nowadays, so perfect lineart is not my priority!! I feel like what I'm known for in my art is my colors, sooo... when YOU guys work on something, think about what makes your art stand out and what you like to see in other art the most. I value coloring a lot and have so many art senpais I look up to mostly based on their coloring~~

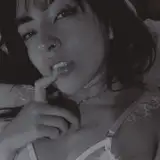
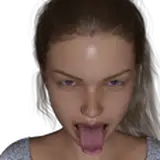
NEXT STEP! Base/block coloring... I like to start off with the skin! I feel like most people do, though? Skin is just so nice to color....
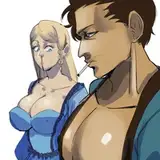
So yeah! This time I was smart(because of my sketch process) and decided where the light would hit before I started shading... so I did a block of a different shade to determine where the big shadows would be.

Sorry this one is out of order! Patreon on computer doesn't let me move it to where i want to.... :((

OK moving on... I decided I was blocking the shadow with too light a color.. So i ended up adjusting the values. I'm a baby when it comes to working with values still, but I'm starting to get the hang of it. SO YEA! I made it a little darker.

Now I can move on and start shading within the shadows. >:^)

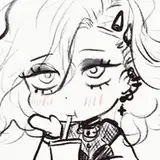
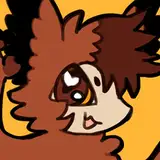
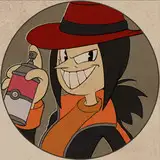
It's so satisfying coloring the lips and eyes to me.... I ended up using a darkish grey to match the values of the shadow for the teeth and then used the same grey for the white of the eyes! All of this is in the same layer btw!

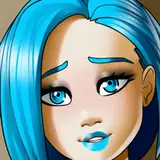
Now for the hair(seperate layer).... I usually color things in like this when I do my lineart~ Then I go in with the paint bucket tool in Clip Studio Paint and clicked this part, with transparancy(IMPORTANT. This will erase it) and clicked on the color outside of the lines.


After doing that, I go ahead and draw little stray hairs around~ This is a detail I find a lot of satisfaction in adding hehe

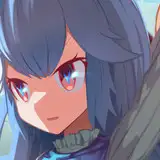
Then, for shading hair, I tend to lock my layer and look for the big shapes in the whole thing. For this, I have to zoooooom out a lot and shade from there. This is just for blocking the shadows like with the skin, btw!

After finding the big shadows, I go in and start shading with a smaller brush size and do the details on the hair~

THEN! I go in with a mesh brush I got from the assets store in CSP. (I'll add the link to it in a bit!)

Then i just go and erase it and do the little... seams(?) of the glove :^)

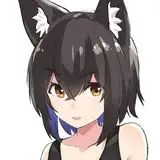
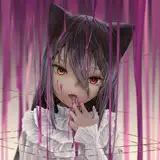
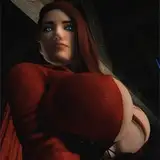
I save details like highlights, and accessories for the very end... I enjoy it so much...

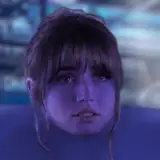
I grabbed the concrete wall background texture from the material library inside CSP and add a dark gradient coming from the side where the light is not hitting. Then I adjust the colors a little :^)

Afterwards, I save the whole thing and move it to Procreate where I do post adjustments~ I really like their chromatic aberration filter, so I add a subtle effect.

ANDDD That's it~ Everything else is just adding a bit of glow to the sides where the light is hitting the skin.
I hope this was an enjoyable step by step for you guys~~ Thank you for your support!!! <3 I'll try to do more of these~


![Jive Faury [SDD Lab]](https://samuzai.com/istorage/43236.jpg)