Hey Everyone!
I've noticed that perspective is a topic I often reference in my pieces and articles, but have never dedicated an entire article to it. So, today, let's start with the fundamentals.
We have many beginner artists here on Patreon, as well as professionals who have different approaches to these technicalities. I want to ensure we're all on the same page. So, let's dive into three fundamental principles of perspective for beginner artists and three more complex concepts for the pros!
1. Introduction to Perspective: Perspective is a drawing method used to represent three-dimensional objects and space on a two-dimensional surface (your canvas). In illustration, perspective is fundamental as it establishes a sense of depth and spatial awareness, creating an illusion that imitates our visual perception of the world.
The simplest example you can imagine is when you're drawing a landscape with mountains in the background and a house in the foreground. The mountains will appear smaller, even though we know they're larger than the house.
2. Types of Perspective: There are several types of perspective you can use in your illustrations, the most common being one-point, two-point, and three-point perspective.
- One point perspective has a single vanishing point and is typically used for roads, railroad tracks, or hallways.
- Two point perspective, with two vanishing points, is great for drawing buildings or objects viewed from a corner. It's also commonly used in character design to show a three-dimensional version of shapes apart from the front and lateral views.
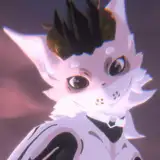
- Three point perspective, with three vanishing points, is often used for buildings seen from above or below. This is the perspective I most frequently use in compositions where I choose to depict the character from an above or below angle.
I'll attach a cube in which each of these three perspective fundamentals is applied.
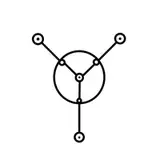
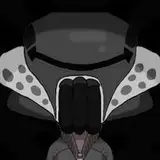
3. Vanishing Points and Horizon Line: In a drawing, the horizon line represents the viewer's eye level and divides the sky from the land. The vanishing points, which always lie on the horizon line, are the places where parallel lines seem to converge in the distance. Using the vanishing points and horizon line can help ensure your drawing has accurate perspective.
You can find a brush in my set called "M@_Vanishing_Point," which can help you easily draw this fundamental as a reference. I'll attach some pictures and PSD File in which I've used this brush, so you can see how the vanishing point is expressed in those compositions.
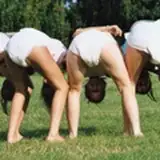
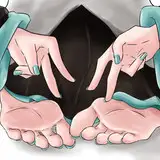
4. Foreshortening: Foreshortening is a technique used to create the illusion of an object receding strongly into the distance or background. It's crucial when drawing objects or figures in perspective, especially when viewing them from an angle. For instance, consider how a road seems to narrow as it stretches further away. That's foreshortening!
You will often see this effect in my character illustrations where the hands appear larger than the head. This is perspective at work. You can find more about this illusion in this article: https://www.patreon.com/posts/capturing-energy-85556876
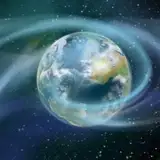
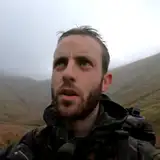
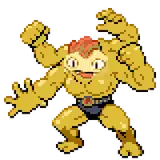
5. Aerial Perspective: Also known as atmospheric perspective, this technique shows depth by changing color and reducing detail in objects as they recede into the distance. This is particularly useful in landscape painting, where the effects of atmosphere on a scene can be striking.
You will find this treatment in any of my illustrations where I've pushed perspective. It often occurs in the "values" phase, as the values at different distances change the strength of bright and dark tones. Additionally, the further the distance, the less saturated the tones are.
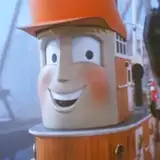
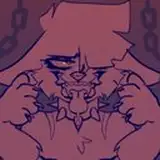
6. Distorted Perspective or Fish-eye View: This is an exaggerated perspective that mimics the visual distortion created by a fish-eye lens. It's a fantastic way to inject some dynamism and visual interest into your work.
This technique is probably one of the most popular characteristics of my drawings. It's essentially a mix of everything mentioned above. However, as an extra step, after applying the perspective, I like to select the shapes (using Ctrl+T) and apply something called "Warp" in Photoshop. This helps me create curvature over shapes and lines to resemble a fish-eye look.
Conclusion
Perspective helps to immerse the viewer into your pieces, assists you in understanding shapes in a more comprehensive way, and also provides a more realistic view of the world in your head. Mastering this fundamental aspect of art is not an easy task, but addressing the concepts we touched on today helps to clarify the path I often follow in my art. This way, you too can apply certain rules to your own work. I'll be discussing more on this subject in the upcoming posts, so stay tuned.
Welcome to all new patrons! Feel free to drop any questions here in the comments, via DMs on Patreon, or in our Discord group. I'll be more than happy to answer and track your progress.
If you found this article useful, please drop a like or a comment! I appreciate the feedback and criticism as well, as I strive to improve and provide you with the best content.
For more information, check out our Patreon FAQ: https://ramonn90.myportfolio.com/faq and Patreon Catalogue: https://ramonn90.myportfolio.com/work
Your support makes this content possible! Thank you.
Ramon Nuñez
2023-09-08 09:16:25 +0000 UTCMiranda CU
2023-09-07 19:17:28 +0000 UTCAliz Windy
2023-08-27 07:25:45 +0000 UTC