A follower here reached out and asked for more of my editing process and specifically referenced some before and after images that I had done. So tonight I'm sharing with you some of the stages it took to get one of my MANYONE exhibition images from start to finish. I'm hoping it doesn't ruin the magic for you.
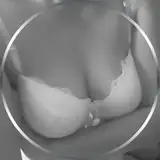
You'll see there are some numbers on the images above so in numerical order starting at #1 you'll see just how rough the images started. Because I'm very inexperienced with underwater photography I'm still learning the best camera settings to streamline the process but it does seem from all my research online that the colours will always need a lot of adjustment. That's because water filters colours out of the light spectrum at different rates.
#2 shows you how different those colour adjustments make the image look and how much more "correct" they are. Then it was on to the background. #3 shows a clear shot of the pool which I tried to use to build out the extended background but I ended up using a shot from another part of the shoot on the day. I extended the background and used it to create a texture which I then overlayed with a blurred extended colour layer to make it feel like a big wide, deeper pool than it was.
Image #4 is that extended background once I'd created the texture and colour overlay. Then it was time to put all the copies of Justin swimming around and get the positioning right. That included removing anything that wasn't Justin or fabric from each image, cleaning up all the bubbles and marks. There is something about underwater photography that means every damn bubble is visible in the shot, even when you can't see it through the lens. That left me at #5.
Then it was time to add shadows on the base of the pool and add some shading on the figures to make them sit together better which finally got us to the final image.